Monday, February 28, 2022

Twinkling Bouquet

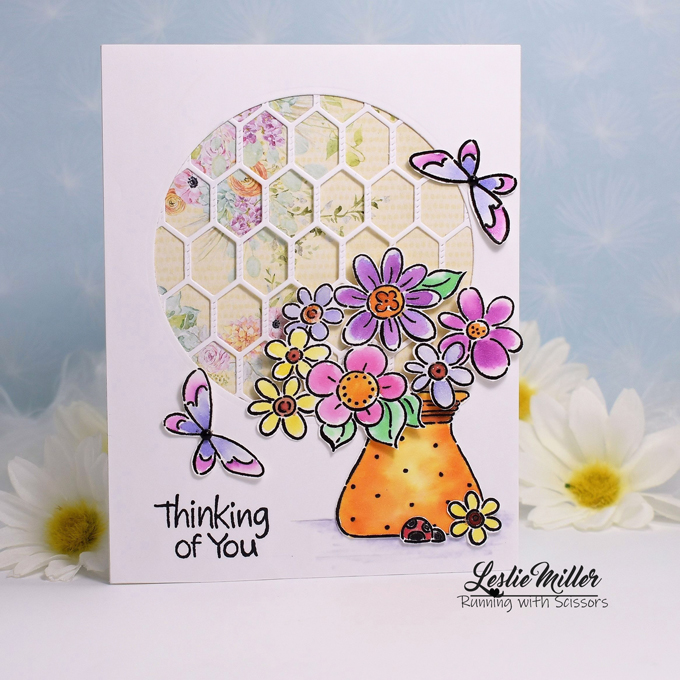
Hi there!  Still trying to catch up with the blog posts.  I believe I made this card in January.  It's a perky and fun Stampendous set called Pop Bouquet.  I still have a few lot of Stampendous in my not-yet-used baskets.  However, this set is no longer NBUS as it's card #2 after I stamped and embossed everything multiple times and watercolored all with Twinkling H2O's.  It's my favorite way to insure a set gets thoroughly used before I put it away.


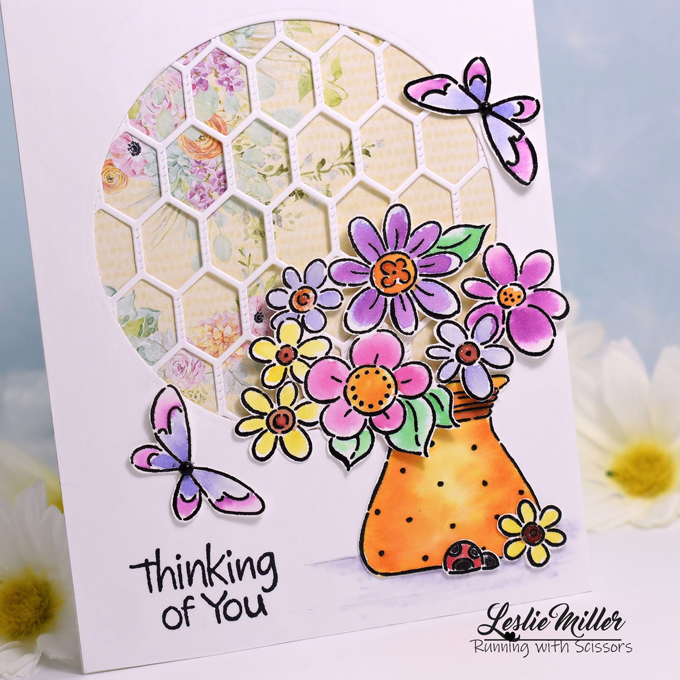
Those little pots of Twinks sure produce some pretty colors.  Lately I've been going for simplicity in my coloring as I still have a trigger finger problem.  This time it's in my right ring finger and it's the worst yet in terms of working around it, grrrr.  We do what we can, right?

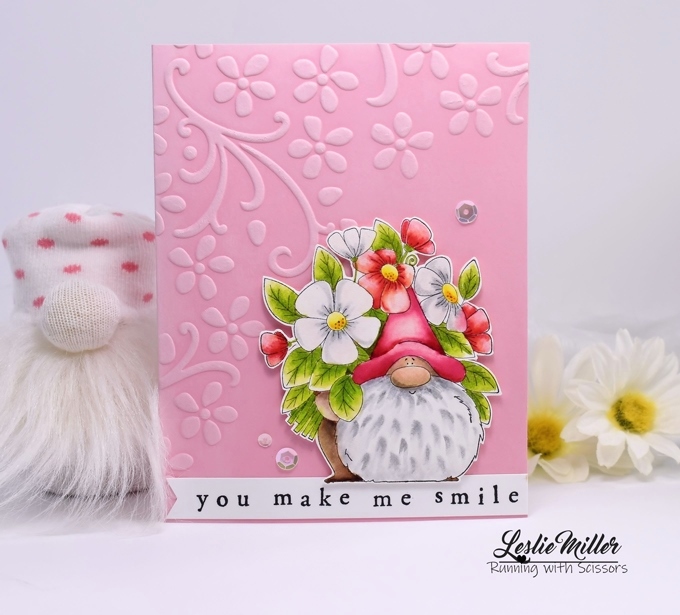
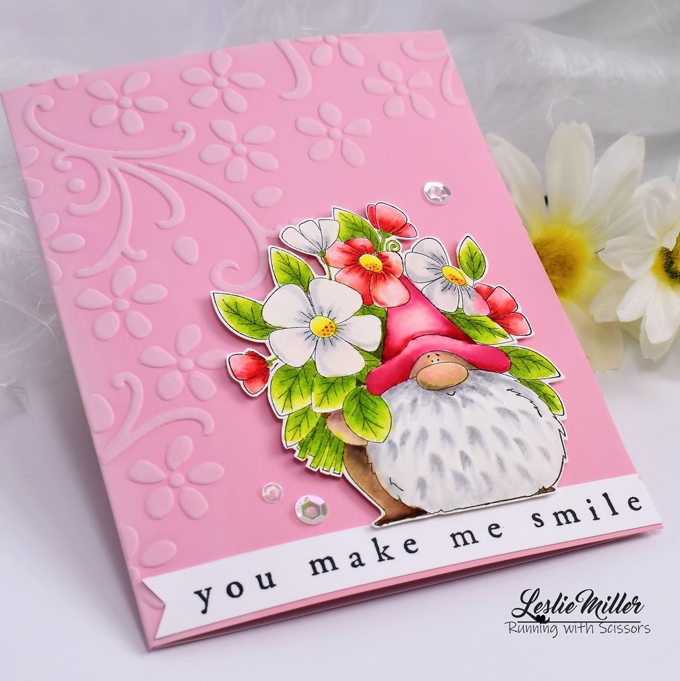
I love playing with arrangements of all my little cut out pieces.  This one has chicken wire over some gorgeous Mintay paper.  The flower bunch is popped up.  Very cheerful!


I'll keep this quick today and leave you with dreams of springtime and warmer days.  We had a stretch of sunshine, but chilly wind, and then on Friday it was gorgeous.  We spent the day in the country with family, mostly outside.  You'd never know it was February.  Keep your hopes high!


Stamps:  Stampendous Pop Bouquet  Paper:  Fabriano Artistico Extra White 140 lb hot pressed watercolor, Neenah 80 lb white, Co'redinations 65# white base, Mintay Lovely Day designer paper  Ink:  Versafine Onyx Black, Memento Tuxedo Black  Coloring:  Watercolor with Twinkling H2O's  Other:  Small black pearls, clear detail embossing powder, Spellbinders Standard Circles Large, Cheery Lynn Chicken Wire Frame, dimensional dots for flowers


Thursday, February 24, 2022

A Valentine, A Spring Greeting, and a Birthday

Hello and welcome!  I'm happy to be back with another collection of cards to share.  When I look at all the cards I haven't posted yet it surprises me that I've actually done that much crafting.  Today's cards are the most recently finished.  The plan was to get ahead on Valentines for next year so I pulled out an old and well loved Stampin' Up set called Send a Celebration.  Anyone remember it?


I've loved this stamp set enough to keep it over many years and many purges.  It seemed to me it deserved another run before I put it away again.  I turned this into a self challenge:  Use all three image stamps and the same DCWV Baby Girl paper pad for each card, and color all with the same Copic markers (mostly) to coordinate with the paper.

The umbrella stamp in the next card has been used in the past for "under the weather" and baby showers, but today it's a spring greeting.  April showers bring May flowers!


The last card gave me the most trouble as I wanted it to look like a celebration, but was running out of celebratory-looking papers from this pad of sweet baby papers.  The embossing folder helped.  I cut a window to frame the image, added some die cut stars and little bits of extra sparkle and shimmer.  The paper, itself, has sparkles, too.


My Valentine card is representing in the Snippets Playground Challenge #422.  Each of my cards are all about snippets -- I stamped on scraps of Neenah white and colored with Copics, then designed with scraps of baby-themed designer paper (use it or lose it).  I keep the smallest pieces of everything because you never know when you might need to punch a few small hearts, such as those on my Valentine card. 


I'll be back next week and I hope you'll come visit again.  Be happy!


Monday, February 21, 2022

Puffin Splash Edger

Hey there, I have several photos today.  I had to wait to share these cards because I didn't want to spoil a birthday surprise.  I treated myself to some new dies that I've been loving from afar for quite a long time, and as so often happens I couldn't decide which ones I wanted... so I got several.  It was still not easy to narrow it down.

Today I'm sharing four cards all made with the Creative Expressions Puffin Splash Edger.  I fiddled around until I got my groove on with it.  The first card shown is my favorite result.


When I bought the edger dies I figured I'd be cutting in white or other solid color and placing over a blended background.  In the end I thought the Puffin looked way cool on the Mintay Marina designer paper with a matching solid blue underneath.  In the area of the pretty Mintay design I pieced two fish and a heart-shaped splash back in so as to relieve some of the busyness.  The bottle was cut from the Mintay paper and a sentiment stamped.  Cardstock and ink are SU Brilliant Blue.  Pearls for embellishment.


A second favorite idea was to use just part of the die as a focal piece.  After cutting the die in white I cut again with a stitched circle die.  I stenciled a red on red background, added the blue dotty frame, then matted on a larger white circle.  All that was added to a Mintay Marina covered card and tied with baker's twine.  The card is an odd size, not quite square, not quite A2.  That's because I goofed one day when making square envelopes on the envelope punch board.  Rather than discard the envelopes I simply made cards to fit.


I like this idea for stretching the use of the die.


Finally, the last two cards are the first I made and more closely resemble how I imagined I'd be using this die.  I did not make my own backgrounds, but remembered my Vivid Ink Drops designer paper.  Hey, if I'm going to be a designer paper fanatic I might as well make a point of using it.  I like these cards, too, but they did not turn out to be my favorites.


Thank you so much for stopping by.  It was great fun making these cards and sharing the ideas.  It's not often I start playing with new acquisitions almost as soon as they come in the mail.

Now it's time to send one of these pictures over to Darnell's NBUS Challenge #35.  Lots of great things to see over there!


Wishing you a wonderful day!


Thursday, February 17, 2022

Gnome Bringing Flowers for a Smile

My NBUS baskets are full of the most wonderful things, many of which I've looked at so often they hardly seem new anymore.  However, the moment I start to play with an item its wonderful newness all comes back to me and I have the best time.  Such is the case with this Flowery Gnome from Stamping Bella.


Just a mention:  The little gnome I included in the photo was given to me by a friend on Valentine's Day.  She made it from a baby or toddler sock and fake fur.  So cute!

My paper gnome was stamped on watercolor paper and colored with Tombow markers -- no water, and only minimal use of the blender pen.  I hand cut my gnome and the sentiment, then arranged with sequins on the embossed card base.  Gnome is popped up on foam tape.  The sentiment, BTW, is an oldie from Stampin' Up.

Now, about that pink embossed card...  I was inspired by a brand new challenge called Can You Handle the Pressure?  It requires the use of an embossing folder and there will always be an optional twist.  This time pink is the twist.  Those two prompts helped me make quick decisions on the design.


The embossing folder is one I've had for years -- Elegant Bouquet from SU.  I brushed the raised pattern with white pigment ink, directly from pad to paper -- always a soft look whatever the color you apply the white to.  Gnome looks right at home, doesn't he?

All tolled I'm playing in three challenges today:

Can You Handle the Pressure? -- Embossing with a Twist of Pink  Thank you for another great challenge, Darlene and Diane!
Double D Challenge:  Shades of Pink.  I was a lucky random prize winner in the previous DD challenge.  Thank you again, Darlene and Diane!
NBUS Challenge #35  Many thanks to Darnell for this challenge which reminds us to bring out our never-been-used treasures.  Today it's my Flowery Gnome.

My card is a Valentine for next year.  Maybe I won't get caught empty handed if I make a few ahead.

Have a happy day!


Stamps:  Stamping Bella Flowery Gnome, SU Simple Sayings II (2003)  Paper:  Fabriano Artistico Extra White 140 lb hot pressed watercolor, Neenah white, SU Pretty In Pink  Ink:  Palette Noir for image, Memento Tuxedo Black for sentiment, white pigment ink for highlighting the embossing  Coloring:  Tombow markers, no water, some blender pen  Other:  SU Elegant Bouquet embossing folder, sequins, foam mounting tape

Monday, February 14, 2022

Faux Cloisonne Flower

Hi there!  I hope this Valentine Monday finds you well.  We're all good here.  Things have settled down a bit for the time being and I'm focusing on home and friends and card making as time allows.

Today's card is not a Valentine, but a birthday card for my depleted stash.  It came about entirely because of the CAS Mix Up Challenge which Susan is hosting.  She's asking for Faux Cloisonne.  You can see beautiful samples and "how to" links on the challenge blog.  I did not have any suitable glossy magazines so I looked to my designer paper stash knowing I had some beautiful papers with a satiny gloss finish.  This felt a lot like paper piecing.


The flower and sentiment are from a 10 yr old Penny Black set called To You.  I stamped and gold-embossed twice.  The bottom layer is the full flower which I hand cut and then glued onto black, then trimmed again with a bit of border showing.  The top flower layer was trimmed to a smaller size, easily following the lines of the stamp.  The sentiment was stamped in Versafine Onyx Black and clear embossed.


Other bits are a black pearl for the flower center, a gold frame from my "card parts" box,  splatters of dilute SU Regal Rose ink, and Frieda Leaf  by Memory Box.  The gloss of the designer paper doesn't show much, but it sure is pretty and all that gold is rather spectacular.  It may not be CAS enough for the challenge, but I sure do appreciate how the team inspired me and so I'll happily share it.  Two challenges:

CAS Mix Up Card Challenge:  Faux Cloisonne
NBUS Challenge #35 because, believe it or not, my 6 yr old Frieda Leaf is a first time use.  Now, don't be too shocked... I bought it from an estate sale more recently than that.  Okay, so it was over a year ago.  I know -- what took me so long?  Sheesh!


That's it for today.  I'm so glad you stopped by.  Have a happy Valentine's Day and enjoy the rest of your week!


Thursday, February 10, 2022

Meerkat Valentine for My Sweetie

Hooray, I made my sweetie's Valentine, played in a challenge, and cracked the seal on my NBUS meerkat set all at the same time.  I love when that happens. 

The challenge is Double D's "Hearts".  You can scroll down to see the mood board, but I'll tell you it was the red gingham that inspired me.  The big letters are Memory Box Wooden Alpha.  I cut down the "I" to make the plus sign.  Unfortunately it looks like a cross to me, and once I saw it that way I couldn't get it out of my head.  Then for some reason the grass border looks like green fire, so now I have a cross set in green fire... it's distressing, but I'm sure it's all in my head.  Is it in yours now, too?


Gerda Steiner Meerkats on the Lookout...  Colored with Tombow markers.  I cut around their arms so they could hold the love sentiment.  Love is a reverse stamp (solid except for the letters) which I stamped in Versamark on black cardstock, then embossed with white EP and then iridescent EP.  The sparkle doesn't show in the photo on the sentiment, but that's what those speckles are.  The hearts were embossed with iridescent embossing powder which does show up somewhat in the photo.


Geez, so much to tell on a card like this...  it's a lot to read, too.  I'll wrap it up -- the red gingham is a lightweight cardstock which I have in several colors in a 12x12 pad.  As always, I cut the whole card with it (finished size is 3 1/2 x 6).  By the time the layers and elements are added you don't notice how lightweight the cardstock is.


Double D Challenge:  Hearts
NBUS Challenge #35 -- My Meerkats are fresh out of the package.


Well, that was fun!  I won't have time to send Valentines this year, but I might make some for next year.  It sounds like a good idea to me!  Sending love & hugs to all!


Stamps:  Gerda Steiner Meerkats on the Lookout, Memory Box Big and Little Reverse Words  Paper:  Fabriano Artistico Extra White 140 lb hot pressed watercolor, black, red, green cardstock, Neenah 110 lb CS for dimension under the letters, lightweight red gingham cardstock, scrap wood grain designer paper  Ink:  Versafine Onyx Black, Versamark  Coloring:  Tombow markers, no blender  Dies:  Memory Box Wooden Alpha, MFT Die-namics Fresh Cut Grass, Paper Smooches Hearts, miscellaneous small rectangle  Other:  Detail clear embossing powder, white EP, Iridescent Peacock EP, Signo Uniball white gel pen, foam mounting tape

Monday, February 7, 2022

Snowman

Hi there!  I have a few cards I've never posted due to all the distractions lately and so will hope to share them this month.  In this case I had planned to make several more CAS snowman cards for a Christmas batch but after a month and a half of good intentions I've decided to save the rest of them for later.

I saw the CAS Christmas Card Challenge where host Christine is asking for a winter scene and so I figured this fit and it's time I get back into the fun of an occasional challenge.


I used three die sets:

Memory Box Snowman Heart Collage
Impression Obsession Let it Snow
Impression Obsession Small Snowflake Set

Arranged all that against a 110 lb card base embossed with the Sizzix Snowfall folder.  The colored parts are Copics, the eyes and buttons are Viva Decor black pearl pen.  I applied Wink of Stella to the sentiment and snowflakes so it's all shimmery pretty in real life.

CAS Christmas Card Challenge -- Winter Scene


Also sharing at two other favorite challenges:


Thanks, everyone, for coming to visit.  I love when we can get together and I'll be back soon, I'm sure. 

 Have a great day!


Thursday, February 3, 2022

A Card and an Update

Dear friends, first I would like to offer my thanks and gratitude for your support and kind words during this time that's been all upside down and backwards.  I hope I haven't missed emails or been unresponsive and, if so, please accept my most sincere apologies.

About Tuesday's MRI:  Happy dance!  It was the final word after an ultrasound and a CT scan left me unsure of my future.  As it turns out, all of my insides are perfectly normal.  Whew!  That was a crazy ride.  Let's not even talk about that anymore.  It's nice to have something to celebrate, isn't it?

I have a card to share today which I made... gee... a month ago maybe?  The stamp set was a Christmas gift and the card was sent to the giver as a thank you.


The set is Altenew's Books Are Magic.  Colored with Tombow markers and cut with the matching dies.  My friend knows me well -- I love books, love to color, and love when I have matching dies with a set.  I played with Mintay papers and chose all colors to coordinate with the papers.  The sentiment is actually from another Altenew set.  I'll list everything below.

I'll be trying to catch up with visiting in the coming days.  I'm so ready to get back to my happy place.  Have a wonderful day!


Stamps:  Altenew Books are Magic (with matching dies) and Wishing You (sentiment)  Paper:  Fabriano Artistico Extra White 140 lb hot pressed watercolor, coral textured cardstock, Mintay Dear Diary designer paper  Ink:  Palette Noir, SU Chocolate Chip for sentiment  Coloring:  Tombow markers  Other:  Spellbinders Hemstitch Rectangles, miscellaneous small rectangle die, Scotch brand foam mounting tape to pop up sentiment