Wednesday, December 19, 2018

Double D Challenge: Let it Snow! Let it Snow! Let it Snow!

Welcome to another Double D challenge!  I'll admit I get a little excited when it snows, but that's because it happens so seldom here and then it melts away quickly.  Whether you love snow or not, it does make a pretty winter card, so we're hoping to see plenty of it in our Double D Challenge -- Let it Snow!  Let it Snow!  Let it snow!

I've used a Stamping Bella stamp called Frida Loves Frosty and a Power Poppy Nice Things to Say sentiment.


Here's our very snowy mood board:


And a snowflakey prize for a random winner:


I colored with Copic markers and added plenty of sparkle.  I'll list details in the recipe below my signature.


You'll find lots more info and wonderful team samples on the Double D blog.   Warm hugs to all!


Stamps:  Stamping Bella Frida Loves Frosty, Power Poppy Nice Things to Say  Paper:  Neenah Classic White and 110 lb white, SU Pool Party  Ink:  Memento Tuxedo Black, Copics for coloring  Accessories:  Stickles Stardust glitter glue  Dies:  Lawn Fawn Outside In Stitched Scalloped Rectangles, Taylored Expressions Stitched Rectangle Stacklets, Memory Box Stitched Circle Layers, Poppystamps Heart Sprinkle Sash

Monday, December 17, 2018

Bringing Home the Christmas Tree

Well, hello there!  It's been a week since I posted so, sheesh, maybe it's about time, you think?  Whenever I go to my room and try to be creative I end up with a big mess and very little else.  Too much holiday stuff on my mind, I guess.  This week I do have a few things to share, though, and starting off with a totally masculine Christmas card which turned out to be one of my favorites.


It was the last card I made for this year's mailing.  Sent to the father and son owner/operators of the RV park we visited over the summer and fall.  Rich loved his birthday card, so he suggested I make a similar card for them.  No need to twist my arm.  I was planning to use these dies for Christmas, anyway.

I combined Memory Box Pine Forest Frame, Impression Obsession Classic Truck, and Poppystamps Stitched Landscapes.  Cut an extra tree and put it in the back of the truck.  It took some time with layering and coloring, but I love how woodsy and festive it turned out.  More details are listed below my signature.


I'll return on Wednesday with the Double D challenge and then we'll see what happens after that.  Christmas is coming together little by little.  Wouldn't it be nice if we could put everything else on hold?  Enjoy your day!


Stamps:  Hero Arts Christmas Greetings Message  Paper:  Neenah Classic White, kraft wood grain card stock, Core'dinations red, SU Very Vanilla, American Crafts Kringle and Co. designer paper  Ink:  SU Chocolate Chip (sentiment), Copics for coloring truck and green tree  Accessories:  Stickles Stardust glitter glue  Dies:  Impression Obsession Classic Truck, Memory Box Pine Forest Frame, Poppystamps Stitched Landscapes

Monday, December 10, 2018

Quick and Simple Ornament Cards

It's only 15 days till Christmas and I just this weekend finished the last of this year's cards and decorated the house.  I also made the annual Shutterfly photo book and calendar and did a bazillion other things (whew).  I'm running later than usual.  There's always a point at which the frazzle goes away and the fun begins, and I'm just about there.  How about you?

I have more CAS assembly line cards today.  Four of these with gold and red mirror card stock, glossy black bow, gold trim, and a little bit of non-Christmas designer paper.


A long, skinny die like this "merry" can make you crazy, trying to get it straight... glue on your fingers, pulling it every which way, grrrr.  Easy solution:  I cut it into a white panel first, then set the gold "merry" into it.  Slipped right into place.  Also, I drew a light pencil line on the card stock as a guide for lining up the die nice and straight.  Easily erased afterward.  Very quick cards!


However... I was then left with the four white "merrys" that popped out when I cut the negative space.  I couldn't bring myself to throw them out, so I layered two together (much more time consuming and troublesome) to make two sentiments, which I then colored with a red Copic and created two of these cards with the polka dot ornaments.


A score line helped with placement of the "merry" on this design.  Each designer paper ornament is layered onto a white ornament backing for substance.  The ornaments and bows are the quick and easy part.

The ornaments are not actually ornaments.  They're from an old set of JustRite Custom Charms.  I believe the Memory Box Merry Cursive die is retired, but the Poppystamps Prim and Proper Bow is current.  Good thing I'm not in the business of selling dies, right?

Merry merry!!


Thursday, December 6, 2018

Stitched Christmas Critters

Hello, friends!  I'm on a roll with simple die cut Christmas cards.  'Tis the season for the cards to get quick and easy, isn't it?  Today is the first of several designs for in between the coloring.

I could not resist this Stitched Christmas Characters die set.  They're so ultra-playful and fun I made nine cards -- three with each character.  I was able to cut all the dies for all three critters in one pass through my Big Shot.  Just did that three times on white card stock and my critter parts were ready to color.  First is the reindeer.


I found it easiest and most enjoyable to cut them in white, then sit on the couch with my Copics, my glue pen, and my own real life cuddly critters tucked up close.  In no time I had the die cut characters colored and assembled.

Here's the polar bear:


The parts are not so small as to be unmanageable.  Even the noses and pom poms were easy enough.  I balked, however, at the eyes.  Those were added with a black marker.   I love the fox, but I'm not thrilled with how my drawing of his closed eyes turned out.  Seems like it should have been so easy, sheesh.  Maybe next time I'll try the die cuts.


Neenah 110 lb white for the card base.  I made frames with Die-namics Wonky Stitched Squares and backed them with designer papers.  Added a snowflake with circle-punched sentiment.  The "joy" is an old SU Glad Tidings set.  It's a solid square stamp, but I almost always punch it into a circle.

It took all my control to keep from varying the designs or adding more, but I'm glad I managed.  I like them just like this.  Maybe I'm learning.  Have a happy day!


Monday, December 3, 2018

Stamping and Coloring on Vellum

I spied a challenge that prompted a simple card.  It's Back to Basics and Beyond Stamping and Coloring on Vellum.  I was curious to see how one of my new Power Poppy stamps would look with this easiest-of-all coloring.  I used the clear set, Let Your Heart Be Light.

Stamped on vellum with Versamark ink, gold embossed, and colored on the backside with Copic markers.  No tricky shading on this one, although I think it could be possible to a certain degree.  Maybe next time.


I made a frame and adhered it to the vellum with 1/4" and 1/8" Scor-tape, which solved the problem of adhesive showing under the vellum.  Backed it up with white card stock and trimmed the outer edges flush.  Added the die cut sentiment and a die cut poinsettia.  The folded card measures 6 3/4" x 3 3/4".

Inside is a gold embossed sentiment:


I liked it with the simple, pristine white.  I considered colors, designer paper, a gold die cut poinsettia, and rejected all of them.  I will say that when one chooses all white at the outset, it makes finishing up the card a very quick process.  I'll list supplies below.

Here's that challenge again:  Back to Basics and Beyond Stamping and Coloring on Vellum


Thank you so much for dropping in during this busy season.  Happy holidays!


Stamps:  Power Poppy Let Your Heart Be Light  Paper:  Neenah Classic Crest Solar White, vellum  Ink:  Versamark, Copics for coloring  Accessories:  Ranger Queen's Gold embossing powder  Dies:  Spellbinders Long Classic Rectangles, Impression Obsession Holiday Bottom Word Edgers, Poppystamps Small Blooming Poinsettia

Friday, November 30, 2018

Birds and Balloons

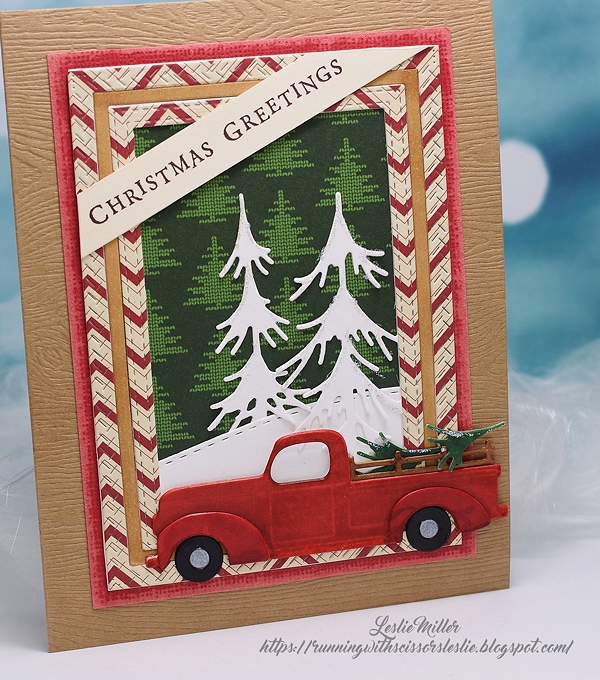
Surprise, I do not have a Christmas card today.  I gathered up my recently purchased and printed All Dressed Up digis, intending to color the two Christmas images, and then did this one instead.  It's called Follow Your Dream and is about as far from Christmas as you can get.

I do have a reason for it.  Every year I make anniversary cards for my friend's four sons and daughters-in-law.  Now I've learned she also sends them to nieces, nephews, grandkids, and just about everyone else and she'd love to have a lot more than four.  Considering the variety of personalities and ages she sends them to, and the fact that I do this year after year, I need to think outside the box if I'm to come up with anything new.


So... I bought this digi for me just because I think it's cute, but I suddenly saw its possibilities as an anniversary card for the young at heart and wanted to make it up before I changed my mind.

It's colored with Copics and "happiness" from an old SU set was added.  Also, feeling lazy, perhaps, I opted not to shade the background, but stamped a super ancient sun from my large collection of southwest stamps that I haven't used in ages.


The stitched and scalloped mats are a combination of two unrelated die sets that work perfectly together and enable dozens of combinations:  Lawn Fawn Outside In Stitched Scalloped Rectangle Stackables and Taylored Expressions Stitched Rectangle Stacklets.  These two sets fit so perfectly together that they can even be nested at the time of cutting.  For this combo I did a variety of cutting, fitting, and layering -- all easy stuff.

The finished card is 5 3/4" x 4 1/2", essentially A6.  By making it just 1/4" shorter it allows centering of the A2 dies without the leftover space in the length.

Inside is a Power Poppy sentiment from the Sweet Simple Things digital stamp set.  My friend can write her own "happy anniversary".  I know she can make it work.  As I mentioned, thinking outside the box.


There is a full list of supplies below my signature.  Back to the Christmas cards now, but I will say this was fun for a change.  Speaking of Christmas cards, I received my first of the season earlier this week.  Happy holidays!


Stamps:  All Dressed UP digi "Follow Your Dream", SU Warm Words "happiness", Power Poppy digital Sweet Simple Things quote for inside, old wood block sun motif  Paper:  Neenah Classic Crest Solar White, SU Pool Party, Taken with Teal, and Marigold Morning  Ink:  Printer, Memento Tuxedo Black, SU Pool Party stamped off once for lighter color  Accessories:  Doodlebug Sprinkles glitter enamel dot  Dies:  Lawn Fawn Outside In Stitched Scalloped Rectangle Stackables, Taylored Expressions Stitched Rectangle Stacklets, Poppystamps Stitched Bloom Trio

Wednesday, November 28, 2018

Winter Birds

Hello, friends!  Here's the yearly question:  How are you doing with Christmas cards?  I took stock and found I'm still a few short, which means it's time for some simple cards before I get back to coloring.  Today I'm sharing two of four I made one afternoon using an old favorite Inkadinkado set called Winter Birds.  Does anyone have this set?  I do think the stamps are beautiful.

The first card was minutes quick, with pretty paper, gold trim, and a die cut snowflake.  The center of the snowflake would be a good place for a rhinestone, but keeping it lump-free and mail-friendly.  The sentiment is an oldie from Stampin' Up.


With Card #2 I figured the swooshing snowflake and slanted sentiment somewhat follow the suggested trajectory of the birds' flight.  I chanced some sequins on this one.  Hope they're still intact after the card goes through the mail.


Both cards use Spellbinders Scored and Pierced Rectangles.  Poppystamps Snowflake Ribbon on #2.  Simple!  Have a happy day!


Monday, November 26, 2018

Power Poppy Cyber Monday and Holiday Digital Blitz

Just in case you didn't make it to the three-day Black Friday sale at Power Poppy, there are two reasons to check out Cyber Monday:


20% off everything in the store, using discount code CYBER20.  Sale ends Nov. 27 at midnight central standard time.

-- AND --


Holiday Digital Blitz!  Ten new digis previously only available as clear stamps.  You can find the entire Holiday Digital Blitz Collection here.  Here's a list of each individual new holiday digi:


Country Home Christmas
(Original clear stamp is Simple Joys)

Handlettered Jolly Good
(Original clear stamp is Joyful Arrangements)

Handlettered Joy to the World
(Original clear stamp is Joyful Arrangements)

Handlettered Noel
(Original clear stamp is Joyful Arrangements)

Filigree Tree
(Original clear stamp is Botanical Tree)

Glass Ornament Bough
(Original clear stamp is Bough Wow Wow)

Mittens and Merriment
(Original clear stamp is Bough Wow Wow)

Paperwhites and Juniper
(Original clear stamp is Glistening Paperwhites)

Snowy Church
(Original clear stamp is O Holy Night)

Tabletop Tree
(Original clear stamp is Under Glass: Christmas Traditions)

I love it when Marcella goes nuts with one of her digital blitzs.  These digis will continue to be available after Cyber Monday, but today they're all 20% off, so it's a good time to shop.

I couldn't resist a brand new card with Handlettered Jolly Good.


Artful image and sentiment in one, I knew this would make a quick and easy card.  Just a length of ribbon and an enamel dot for trim.  I colored with Copics and sponged the edges with the die in place.


Marcella has a few things to say and more samples to share, so please visit her at the Power Poppy Blog.  Wishing you all a happy holiday season!


Thursday, November 22, 2018

Power Poppy Black Friday Sale

Just a heads up to all Black Friday shoppers:


Holy moly, it goes all the way through Sunday at midnight Central Standard time!  Sale includes all in-stock merchandise:  Clear stamps, digital stamps, and dies.  Now is the the time to stock up on Power Poppy at 30% off using discount code STOCKUP30.

Enjoy, and happy day to all!


Wednesday, November 21, 2018

Double D Challenge: Snuggle Up Buttercup

It's Double D Challenge time and we're asking you to Snuggle Up, Buttercup, and get cozy with your crafting.  Be inspired by the mood board to pull out whatever supplies you have to make the creation of your choice.  I'm thinking in terms of Christmas cards, so here's what I did:


In our mood board below you can see it was the red and green plaid and the comfy knitted items that inspired me.


Creative winners are selected by team vote, and a prize will go to a random winner:


So, about that sweater... my friend, Connie, sent me some pages from a desktop coloring calendar to try before I buy, and this sweater was one of them.  She warned me the paper was very thin and not so easy for Copic coloring, but I solved that problem by scanning and printing actual size onto X-Press It Blending Card.  Hooray, it worked!


I mixed up the background with a snowflake-embossed red panel and some gingham over the plaid, tucked in a tag, and trimmed with a stitched scalloped edge.  The snowflakes on the sweater printed black, of course, but I went over them with the ultra-fine tip of a red Stampin' Up! marker.  I use those markers a lot for detail like this.  Gold snowflakes for sparkle.  The sentiment is a Stampin' Up! oldie.  Full recipe is below my signature.

There are some super fun team samples on the Double D blog.  I see Darlene and I had almost exactly the same idea, and some of the girls used a cable knit embossing folder that I'm now coveting.  There are kitties and a puppy and mugs of warm brew... so much inspiration.  Enjoy, and I'll see you again soon!


Stamps:  Calendar page sweater, SU All Year Cheer I  Paper:  X-Press It Blending Card, SU Very Vanilla heavy weight, kraft, SU Poppy Parade, gold glitter card stock, Graphic 45 Raining Cats & Dogs designer paper  Ink:  Printer, SU Chocolate Chip, SU red marker, Copics for coloring  Accessories:  Cuttlebug Snowflakes embossing folder,  Fiskars Scallop Paper Edgers (scissors), Poppystamps Stitched Main Street Tags, Spellbinders Create-a-Flake Five

Monday, November 19, 2018

Twofer Wreath Challenge

Hello on a Monday, friends!  Yippee skippee, I got some cards made in time for the November Twofer Challenge.  Two different designs for two different occasions using the same stamps, stencils, and/or dies.  The prompt this month is "Wreath".  We're supposed to photograph the two cards together for the link up, so I've done that first.


Thinking I could make some quick cards with no coloring, SU's Wondrous Wreath was the first stamp set to pop into my head.  I made the Christmas card first, stamping and turning and stamping multiple times, but still had some blank spots due to a flawed stamp that SU did not want to replace (grrrr), so filled in with die cut Poinsettias and a bow.  Lots of stamping, die cutting, gluing, applying Stickles.  A clean and simple and not so quick card.  Ultimately, I like how it turned out.


The second card was much quicker.  I used only one stamp from the multi-stamp set, whereas I used three on the first card.  Gee, I hope that's okay for the challenge.  It's the same stamp, two different ways, right?   In this case, the flawed part of the stamp is under the gingham designer paper, and I stamped it three times in a row, somewhat like a garland.  Added little flowers punched from glitter paper.  Rhinestone centers.  The flower on the sentiment has die cut leaves.


Honestly, if it wasn't for the Twofer Challenge I may not have ever used this wreath again, but now I love it to pieces because of that sweet garland.  You just never know.

Supplies listed below.  Have a happy day!


Stamps:  SU Wondrous Wreath, Your Next Stamp Whatnot Sentiments Eleven (thinking of you)  Paper:  SU Whisper White and Cameo Coral, Coral glitter paper, Bazzill tan, Prima Julie Nutting designer paper  Ink:  SU Wild Wasabi and Garden Green, Memento Tuxedo Black  Accessories:  Black Stickles and gold Stickles (Christmas), rhinestones, flower punch (thinking of you card)  Dies:  Memory Box Seraphine Laurel (Poinsettias), Impression Obsession Large Bow,  Sue Wilson Pierced Flags, Taylored Expressions Ric Rac Borders, Impression Obsession Leaf Cluster

Thursday, November 15, 2018

Introducing Snowdrops and Tea Roses

There's a delightful new digital stamp set release at Power Poppy today.  It's called Snowdrops and Tea Roses and, ohhhh, how pretty it is!  I printed the no-line version not too large so I could color the whole dainty, delicate, lovely thing.


Marcella's notes:

"The first in a series of bouquets nestled inside vintage French café au lait bowls. Festive enough for Christmas cards; cozy enough for a winter’s afternoon coloring session. This scene features a trio of hybrid tea roses arranged with crisp white snowdrops and variegated holly. Be open and adventurous with your coloring, ie: berries can be white/pink/light green if you are using red roses. Holly doesn't always have to be red. Remember, we are making the picture, nature is just one of our inspirations. 

Digital download includes a no line version, and two merry sentiments.

A few tea rose varieties to use as inspirations to make this bouquet especially festive: 'Bewitched' (pale pink), 'Neil Diamond' (red-and-white streaked), 'Cinnamon Dolce' (dark red with pink streaks), 'Gemini' (creamy center with coral pink edges), 'World War II Memorial Rose' (light pink with tinges of red)."


I used Prismacolor pencils for today's card, and not my usual way of blending with odorless mineral spirits.  Rather, I blended one pencil into another, coloring over and over.  I do love the control and detail with pencils.  Fun for a change!  The background was done with Copic markers.


I cropped one of the sentiments and tucked it up close, then framed and finished.  One more done for Christmas!

Please visit the Power Poppy blog for more from Marcella and a link list to all the Instant Gardeners' gorgeous creations with Snowdrops and Tea Roses.  Thanks much for your visit.  Hugs and happy day!


Stamps:  Power Poppy Snowdrops and Tea Roses digital set  Paper:  Neenah Classic Crest Solar White, Mintay Christmas Stories designer paper  Ink:  Printer  Coloring:  Prismacolor Pencils, Copics in background only  Accessories:  Impression Obsession All-In-One-Frames-Oval, Poppystamps Prim and Proper Bow