Showing posts with label Creative Expressions. Show all posts

Thursday, November 13, 2025

Just Us Girls Word Week -- Winter


Hello again!  It's Word Week at Just Us Girls, with the prompt word being "winter".  If it doesn't feel wintry where you are yet, you know it's right around the corner.  Brrrr!


The character I used for this challenge has been in my die stash (with her reindeer and fox companions) for a good long while and it's been seven years since I've used the set.  It was about time, don't you think?


In order to make her all the more wintry I paired her with Penny Black's Crystal Frames die set which includes the frame and background pieces and the sentiment.  The pink snowflakes are an oldie Impression Obsession Small Snowflake Set.  I inked the sentiment with a brush, and Copic colored whatever other small parts needed it.  All very simple and fun!


Do pop over to Just us Girls to see the awesome team samples, and then we'd love to have you play along with your own wintry creation.  It'll be fun!

Wishing you a wonderful day!


Stamps:  Only inside sentiment  Paper:  Neenah Classic Crest Super Smooth Solar White 90 & 110 lb, Stampin' Up Pool Party sandable cardstock, scrap designer paper  Ink:  SU Rose Red  Coloring:  Copics and ink blending with brush  Dies:  Lisa Horton Creative Expressions Stitched Christmas Characters, Penny Black Crystal Frames, Impression Obsession Small Snowflake Set

Monday, July 21, 2025

Orange Slices

Hello and happy day to you!  I've had a few busy mornings in my craft room and today I thought I'd share some of the fruits of my labor before the day grabs hold of me.  A few challenges prompted me to sit down with one of my newest purchases -- Elizabeth Craft Fresh Fruit die set.   One day I said "I need a citrus set", and so here we are.

I took creative liberties with the colors, using some ancient greens that don't come off the shelf very often -- mostly Stampin' Up Green Galore, with a little Glorious Green ink for shading.  Anyone remember those?  I even colored the flower centers green just because I could.


There are lots of choices with this die set from lemons to oranges to grapefruit.  Even a strawberry.  Not selling, just saying.  I'm imagining today's card with a standard orange slice and a little Clementine.

Covering the card base is Tiny Mosaic, an old Cuttlebug embossing folder from my stash.  It looks rather kitchen-y don't you think?  

In the next photo I hope you can see the Diamond Stickles glitter in the flower centers, and the gloss on the orange slices.  The gloss is packing tape -- brush cardstock with ink, then cover with clear packing tape and cut with the inner die that creates the little sections.  Cut again from non-glossy cardstock to create the lighter colored "frame" for the sections.  Maybe that makes sense???

For embellishment I punched 1/8" circles from the glossy orange cardstock.  The three-layer sentiment is from a not-used-until-now Cottage Cutz set.


One last thing -- the card measures 4 1/4" x 5".  It's what's left over after cutting a mini-slimline; a cute little size, fun to work with, and it fits in a standard envelope for no-extra-postage mailing.

Sometimes it feels like it takes a lot of words to explain a card, but it's all about the sharing and taking the time to visit with you.

This particular card was totally inspired by the following challenges:

Tic Tac Toe Challenge #275 -- I chose the top row:  Nature, Circles, Foliage
NBUS Challenge #76 -- My never before used schtuff is the Fresh Fruit die set and the sentiment from a Cottage Cutz set.


I'm so glad you could stop by.  We'll do this again real soon, okay?  Take care!


Stamps:  None except inside sentiment not shown  Paper:  Neenah Classic Crest Super Smooth Solar White 110 lb, Stampin' Up Green Galore  Ink:  SU Tangerine Tango, Apricot Appeal, Green Galore, Glorious Green  Coloring:  Ink blending with brushes  Dies:  Creative Expressions Fresh Fruit, Cottage Cutz Hello Sunshine, Memory Box Stitched Circle Layers and Stitched Scalloped Circles  Other:  Cuttlebug Tiny Mosaic embossing folder, Diamond Stickles, clear packing tape, 1/8" holed punch, Scotch brand foam mounting tape

Friday, February 17, 2023

Folk Art Flowers and Bird

Hi!  Checking in today with a card that happened while I was busy doing other things.  I had embossed a panel and set it aside for another day, and the next thing you know I was coloring it.  As I went along I realized how folk artsy it looked in these colors, so I continued along those lines the best I could as I finished the card.


The embossing folder is a 3D by Creative Expressions called Fanciful Flowers.  I used Copics for coloring.  No extra skills needed other than a relatively steady hand and a strong pair of glasses.  I made a point of using hearts because they seem to show up a lot in folk art.  The particular bird die I used is the most folk artsy one I own.  It's years old and I still love it -- Elizabeth Craft Birds.

I embossed the card base and the hearts with the retired SU Subtle embossing folder.  It shows up a lot more in real life.  To avoid excess busyness I did not add color to the branch, but there is a layer of black underneath to help it stand out.  By the way, all the white is actually a gentle vanilla shade, including the embossed sentiment.


One of my favorite challenges is celebrating their first birthday/anniversary this month:

Can You Handle the Pressure?  It's all about using embossing folders.  Anything goes with an optional twist of hearts and, as you can see, I did use the twist.  What fun when it all works out like this!


Now, back to being busy doing other things... but I'll see you again soon.  Take care and have a happy weekend!


Stamps:  Hero Arts Small Greetings  Paper:  Cougar Vanilla, SU Wild Wasabi and Poppy Parade, other black & yellow  Ink:  Versamark, Copics for coloring  Dies:  Elizabeth Craft Birds, Tutti Stitched Nesting Hearts, Poppystamps Sylvan Sprig  Other:  Vanilla embossing powder, Doodlebug Matte Sprinkles, Creative Expressions Fanciful Flowers 3D embossing folder, SU Subtle 3D embossing folder

Friday, July 29, 2022

Sweet Nectar

Happy Friday!  Today's card wraps up Creative Expressions Week #1.  I'll do more on this focus another week, but I have a few other things to do in the meantime.  My not-yet-used baskets runneth over.

I think this stamp is so pretty and delicate.  The hummingbirds are make-believe colors because sometimes it's easier to not follow the rules.  I watercolored with Tombow markers.  I could swear the green border was a better match in real life, sigh...  Maybe it's the photo, maybe my memory is faulty (haha, not haha).


The stamp is called Sweet Nectar.  It includes the sentiment.  I added green sprinkles with retired SU Itty Bitty Backgrounds.  It's a simple birthday card, already sent and received.

Sharing my never-before-used Sweet Nectar at Darnell's NBUS Challenge #40.


That's all folks!  Have a sweet weekend!


Stamps:  Creative Expressions Sweet Nectar, SU Itty Bitty Backgrounds  Paper:  Fabriano Artistico Extra White 140 lb hot pressed watercolor, Memory Box Wheat Grass  Ink:  Versafine Onyx Black, SU Glorious Green  Coloring:  Watercolor with Tombow markers  Other:  WOW Clear Gloss Super Fine embossing powder, gold trim

Wednesday, July 27, 2022

Tropical Toucan

Hello again!  Continuing with Creative Expressions week... it's an edger die today -- one of several I bought a few months ago.  This one is called Tropical Toucan.  I've had the most fun with all my edger dies.  They can be simple or you can do more.  With this one I spent a little extra time coloring and piecing.  No fancy coloring techniques, but it really doesn't matter.


After I cut the die I poked out all the little pieces and let them fall in a jumble on a sheet of paper.  It's just like working a jigsaw puzzle, but you color the pieces yourself.  And, yes, there are some very tiny pieces!  I covered the card base with designer paper, glued the die onto that, then went to work with my jigsaw.  The sentiment is Big and Little Reverse Words from Memory Box, cut with it's own die.

Just fun.

I'll share again in Darnell's NBUS Challenge #40 because my Toucan is fresh out of the never-before-used-schtuff basket.


Thank you!  Wishing you a happy, safe, and healthy day!


Stamps:  Memory Box Big and Little Reverse Words  Paper:  Neenah Classic Crest Super Smooth Solar White 110 lb for die cuts/80 lb for card base, DCWV Animal Crackers designer paper  Ink:  SU Poppy Parade for sentiment  Coloring:  Copics  Die:  Creative Expressions Tropical Toucan Edger

Monday, April 4, 2022

A Mouse for Two Seasons

Hello again!  I want to say first how I appreciate all your comments on my previous post regarding to blog or not to blog.  I'm never sure what each day will bring, but isn't that the way for all of us?  Truthfully, it's my connection with this crafting sisterhood that keeps me coming back here.  I'm really not sure what I would do without you, so for the time being I carry on and today I have two cards I made with my edger dies.  These cards were made in either January or February, sheesh.

They're subtly patterned with very little contrast.  It's what I was feeling at the time and I still like them.  When favor endures it's a good thing.  I've always found that, for me, simplicity and subtlety have longer lasting appeal.

The first is for springtime.  This Toadstool Mouse Edger die is probably meant for fall, but I think it looks right at home with the daffodils and yellow (my favorite color).  The mini-slimline measures 3 1/2 x 6.  The paper on this one is 49 and Market Sweet Reflections - Butter.  I applied some old-timey self-adhesive rain dots for embellishment.


The next card feels more like fall and is one of the first I made when I was experimenting with design ideas.  Ultimately I decided less is more and even the string and tag feel like too much.  Each to her own, right?  Most of my fun with these edger dies comes from combining them with designer papers.  Some work better than others.  On the card below are older papers by Prima.


Even though I made these cards a while back, it was a first time use and today is a first share, so I will send a picture over to Darnell's NBUS Challenge #37 for the month of April.

Additionally, I'm playing in a new-to-me challenge:  Colorful Options.  It's a color challenge and this month they're asking for yellow!


I wish you all a happy spring.  It's so good to see the flowers blooming!  Till soon...


Monday, March 14, 2022

Dragonfly Edger

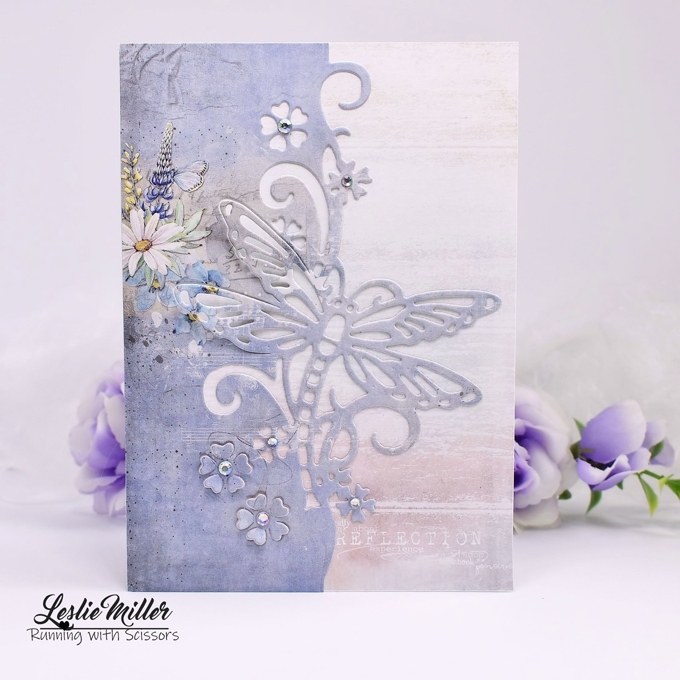
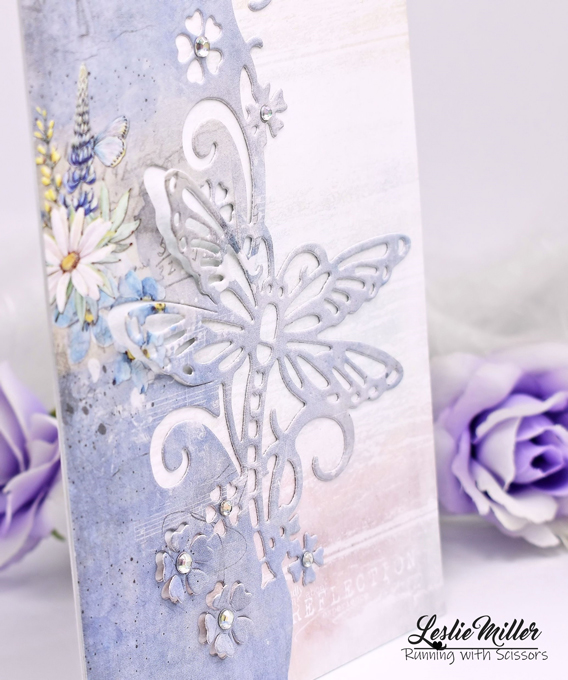
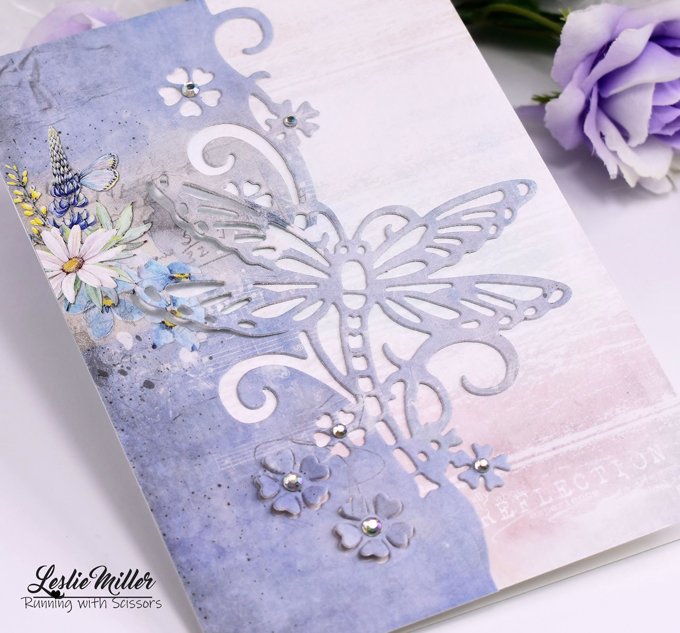
Hello again, friends!  I'm sharing something pretty today.  At least I hope you agree.  I've used another of my new-to-me edger dies by Creative Expressions.  This one is called Dragonfly Edger.


I love how some of the parts lift, rather than cut out all the way.  The pretty 49 and Market paper provides the garden effect, and it appears to me as though the dragonfly is hovering over the edge of a pond.  The flowers have clear gem centers.


There is no sentiment on the front, but this was a birthday card for a friend.


I'm sending my card over to play in the following challenges:

Tic Tac Toe Challenge #152.  I've chosen the bottom row -- Die cuts(s), spring colors, floral
NBUS Challenge #36.  Darnell challenges us to play with some of our never-been-used stuff.


Thanks so much for visiting today.  You know I love it when you drop in.  Take care!


Monday, February 21, 2022

Puffin Splash Edger

Hey there, I have several photos today.  I had to wait to share these cards because I didn't want to spoil a birthday surprise.  I treated myself to some new dies that I've been loving from afar for quite a long time, and as so often happens I couldn't decide which ones I wanted... so I got several.  It was still not easy to narrow it down.

Today I'm sharing four cards all made with the Creative Expressions Puffin Splash Edger.  I fiddled around until I got my groove on with it.  The first card shown is my favorite result.


When I bought the edger dies I figured I'd be cutting in white or other solid color and placing over a blended background.  In the end I thought the Puffin looked way cool on the Mintay Marina designer paper with a matching solid blue underneath.  In the area of the pretty Mintay design I pieced two fish and a heart-shaped splash back in so as to relieve some of the busyness.  The bottle was cut from the Mintay paper and a sentiment stamped.  Cardstock and ink are SU Brilliant Blue.  Pearls for embellishment.


A second favorite idea was to use just part of the die as a focal piece.  After cutting the die in white I cut again with a stitched circle die.  I stenciled a red on red background, added the blue dotty frame, then matted on a larger white circle.  All that was added to a Mintay Marina covered card and tied with baker's twine.  The card is an odd size, not quite square, not quite A2.  That's because I goofed one day when making square envelopes on the envelope punch board.  Rather than discard the envelopes I simply made cards to fit.


I like this idea for stretching the use of the die.


Finally, the last two cards are the first I made and more closely resemble how I imagined I'd be using this die.  I did not make my own backgrounds, but remembered my Vivid Ink Drops designer paper.  Hey, if I'm going to be a designer paper fanatic I might as well make a point of using it.  I like these cards, too, but they did not turn out to be my favorites.


Thank you so much for stopping by.  It was great fun making these cards and sharing the ideas.  It's not often I start playing with new acquisitions almost as soon as they come in the mail.

Now it's time to send one of these pictures over to Darnell's NBUS Challenge #35.  Lots of great things to see over there!


Wishing you a wonderful day!